---
task_categories:
- object-detection
tags:
- yolo
- yolo11
- hardhat
- hat
base_model:
- Ultralytics/YOLO11
widget:
- text: "Helmet detection"
output:
url: example.png
pipeline_tag: object-detection
model-index:
- name: hardhat-or-hat
results:
- task:
type: object-detection
dataset:
type: safety-equipment
name: Safety Equipment
args:
epochs: 65
batch: 16
imgsz: 640
patience: 15
optimizer: 'SGD'
lr0: 0.001
lrf: 0.01
momentum: 0.9
weight_decay: 0.0005
warmup_epochs: 3
warmup_bias_lr: 0.01
warmup_momentum: 0.8
metrics:
- type: precision
name: Precision
value: 0.89279
- type: recall
name: Recall
value: 0.89279
- type: mAP50
name: mAP50
value: 0.56717
- type: mAP50-95
name: mAP50-95
value: 0.56717
---
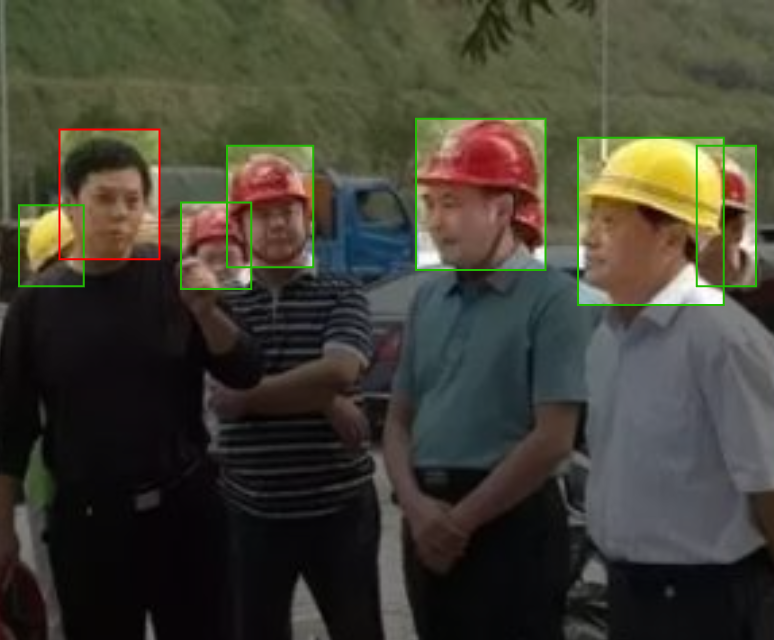
# Model for detecting Hardhats and Hats
## Model binary
You can download:
* [v1 that only detects Hardhat or no-hardhat](https://huggingface.co/luisarizmendi/hardhat-or-hat/blob/main/v1/model/pytorch/best.pt)
* [v2 that detects Hardhat, no-hardhat or Hat](https://huggingface.co/luisarizmendi/hardhat-or-hat/blob/main/v2/model/pytorch/best.pt)
## Base Model
Ultralytics/YOLO11m
## Huggingface page
https://huggingface.co/luisarizmendi/hardhat-or-hat
## Model Dataset
[https://universe.roboflow.com/luisarizmendi/hardhat-or-hat](https://universe.roboflow.com/luisarizmendi/hardhat-or-hat)
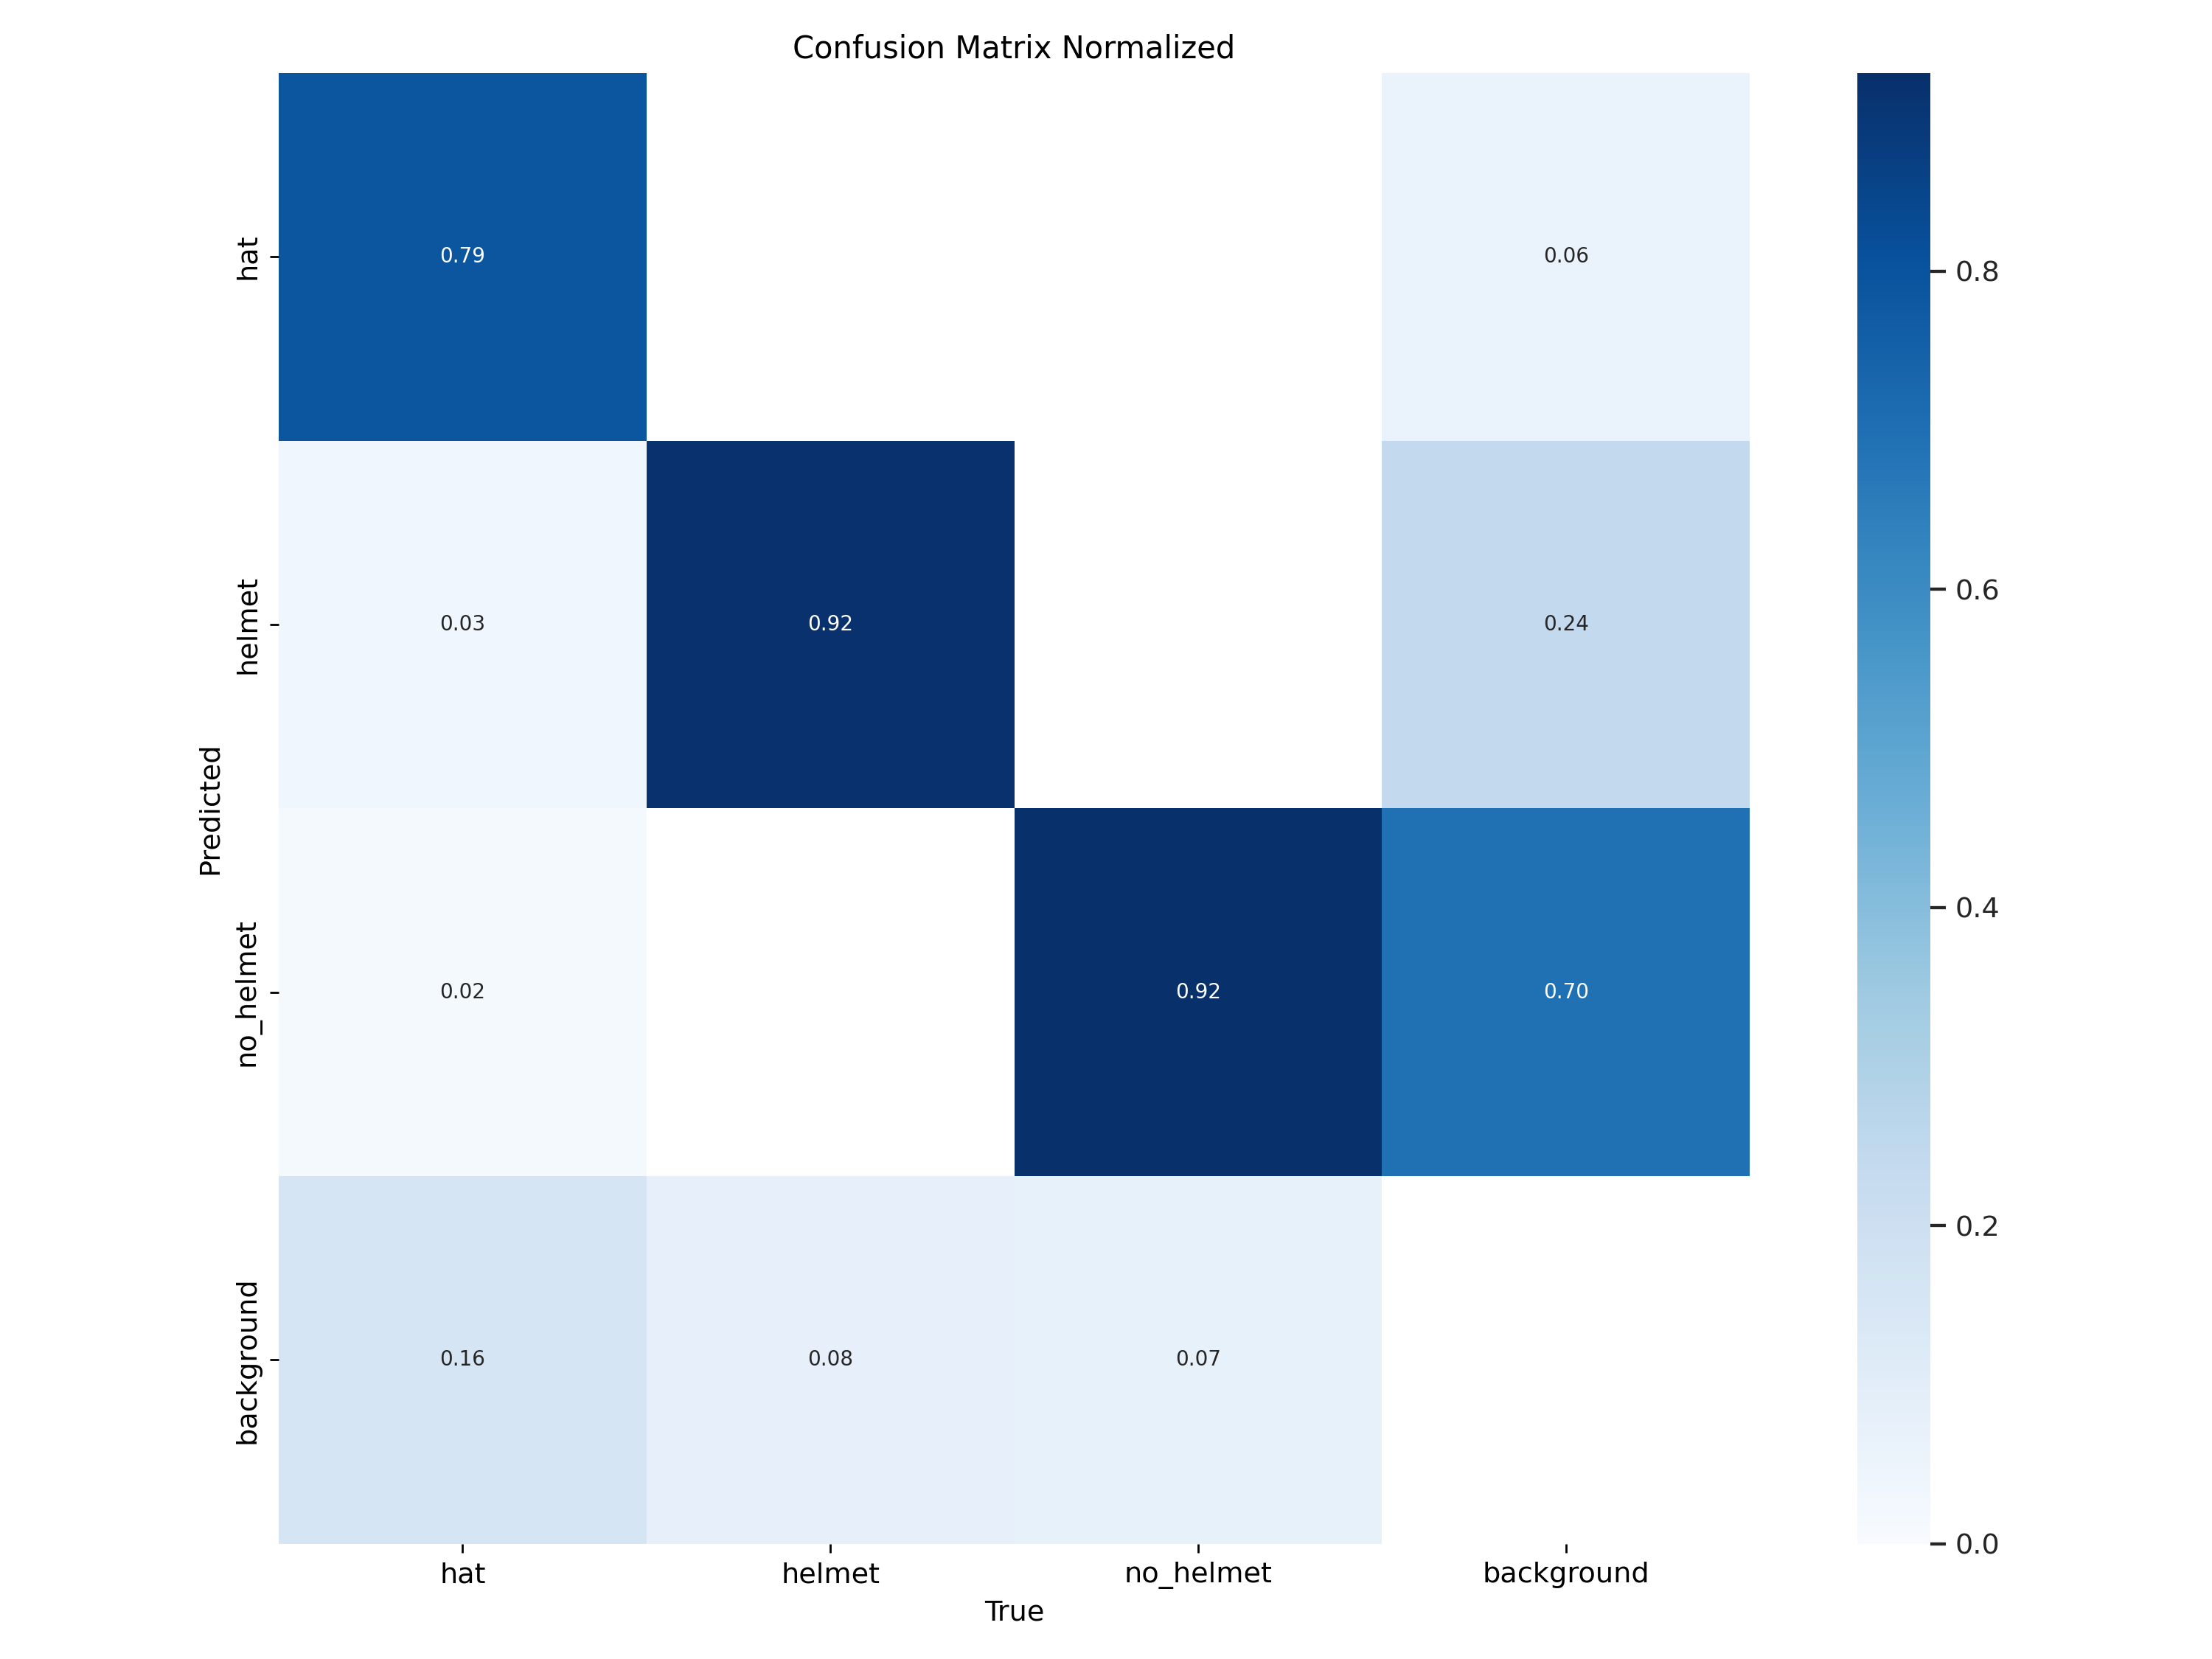
## Labels
```
- hat
- helmet
- no_helmet
```
## Model metrics
## Model training
You can [review the Jupyter notebook here](dev/prototyping.ipynb)
### Hyperparameters
```
base model: yolov11x.pt
epochs: 150
batch: 16
imgsz: 640
patience: 15
optimizer: 'SGD'
lr0: 0.001
lrf: 0.01
momentum: 0.9
weight_decay: 0.0005
warmup_epochs: 3
warmup_bias_lr: 0.01
warmup_momentum: 0.8
```
## Model Usage
### Usage with Huggingface spaces
If you don't want to run it locally, you can use [this huggingface space](https://huggingface.co/spaces/luisarizmendi/object-detection-batch) that I've created with this code but be aware that this will be slow since I'm using a free instance, so it's better to run it locally with the python script below.
Remember to check that the Model URL is pointing to the model that you want to test.
### Usage with Python script
Install the following PIP requirements
```
gradio
ultralytics
Pillow
opencv-python
torch
```
Then [run the python code below ](dev/object-detection-model-file/pytorch/object-detection-pytorch.py) and open `http://localhost:8800` in a browser to upload and scan the images.
```
import gradio as gr
from ultralytics import YOLO
from PIL import Image
import os
import cv2
import torch
DEFAULT_MODEL_URL = "https://huggingface.co/luisarizmendi/hardhat-or-hat/tree/main/v2/model/pytorch/best.pt"
def detect_objects_in_files(model_input, files):
"""
Processes uploaded images for object detection.
"""
if not files:
return "No files uploaded.", []
model = YOLO(str(model_input))
if torch.cuda.is_available():
model.to('cuda')
print("Using GPU for inference")
else:
print("Using CPU for inference")
results_images = []
for file in files:
try:
image = Image.open(file).convert("RGB")
results = model(image)
result_img_bgr = results[0].plot()
result_img_rgb = cv2.cvtColor(result_img_bgr, cv2.COLOR_BGR2RGB)
results_images.append(result_img_rgb)
# If you want that images appear one by one (slower)
#yield "Processing image...", results_images
except Exception as e:
return f"Error processing file: {file}. Exception: {str(e)}", []
del model
torch.cuda.empty_cache()
return "Processing completed.", results_images
interface = gr.Interface(
fn=detect_objects_in_files,
inputs=[
gr.Textbox(value=DEFAULT_MODEL_URL, label="Model URL", placeholder="Enter the model URL"),
gr.Files(file_types=["image"], label="Select Images"),
],
outputs=[
gr.Textbox(label="Status"),
gr.Gallery(label="Results")
],
title="Object Detection on Images",
description="Upload images to perform object detection. The model will process each image and display the results."
)
if __name__ == "__main__":
interface.launch()
```